Motocross bikes are tough, bare-bones machines that you belt down dirt trails with a full twist of the right hand. They’re what you’d see in competition and closed circuit level, tuned for high torque and outright speed whether you’re carving your way through the dirt or flying over jumps. While these bikes deliver bucket loads of fun in all types, they’ll need regular maintenance after only a few hours of riding, and a complete rebuild at the end of the season. But if you’re racing at competition level, this is what’s expected. You’ll also want a way to get the bikes to and from the track or trails, either loaded onto a trailer or sitting at the back of the ute. Getting them up there means you’ll also be investing in a quality bike ramp.
With that sorted, you’ll also want a way to stand out from the crowd. Motocross bikes can be fitted with either ready-made or custom mx graphics, in just about any combination of names, numbers, backgrounds, designs and colours. It’s just one way to get recognised both on and on the trail. Graphics packs and kits are available for a range of different bikes, can be used on all the bike plastics or a few selected parts and replicate the look of your favourite bikes and riders, or be something entirely of your own making.
The Basics of MX Graphics
Graphics kits, just like bikes, go through a sound beating, even on the shortest of rides. They need to stand up against the general wear and tear of rubbing boots, flying rocks and dirt, loads of mud, water and pounding rain and still look good at the end of the race. The materials you choose need to be durable, optioned in the right thickness and have good adhesion to the plastics and bike parts. The good news is that there are different price points that perform at different levels. Graphics and decals use waterproof and UV-resistant laminated materials that ensure that they stay put and won’t fade even after years of use. And they make easy work of regular scuffs and scrapes.
The laminate can be optioned in a gloss or matte finish, depending on the look you’re after. The print base is usually a chrome film affair, accenting colours, numbers and names with a metallic or rainbow look.
Ready-Made Graphics
Pre-made kits are cut to size and shape to fit your bike. They’ll stick to the exact contours of bike plastics, forks, wheels, swingarms, front plates and any part you want kitted out. These are motocross graphics that are often designated to replicate the decals and prints of specific teams or riders. Basic and budget kits are just that, and only help to capture the overall look (and feel) of those bikes, while premium kits go into more detail. When ordering a ready-made made kit, ensure that you get your bike make, model and year right, as MX bikes do undergo minute but crucial changes with each model year, meaning some of the prints may not fit.
Custom Graphics
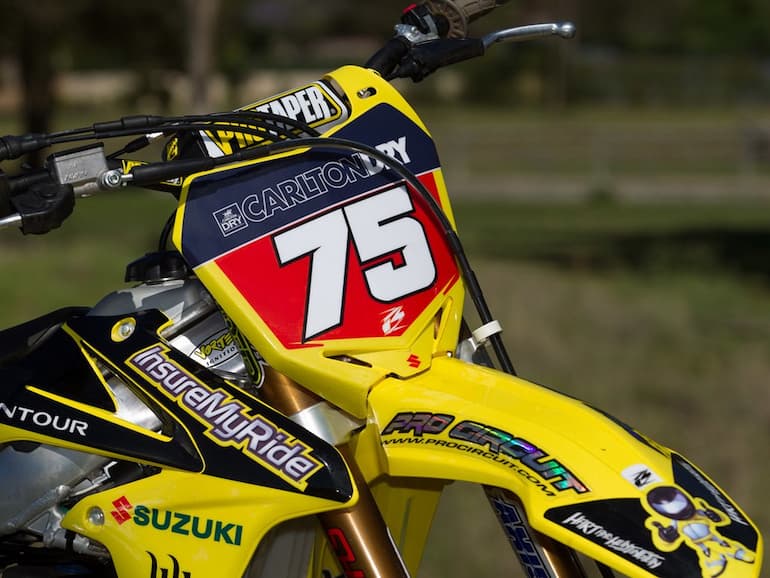
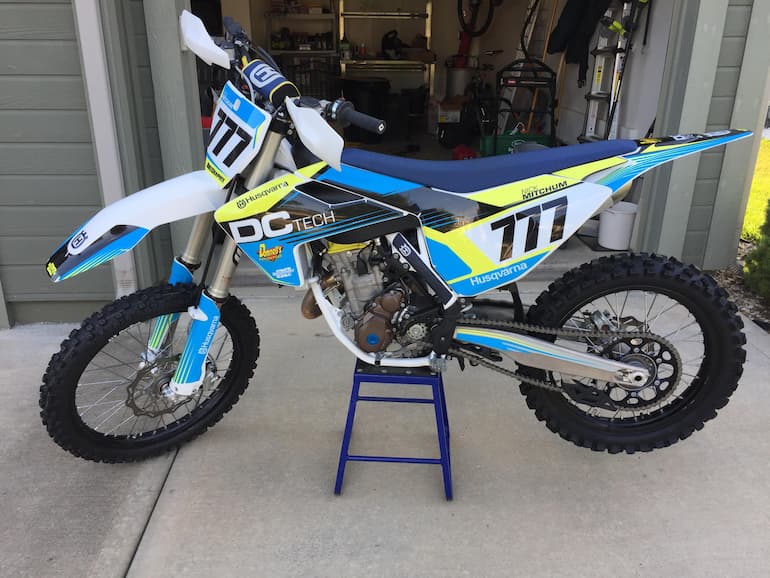
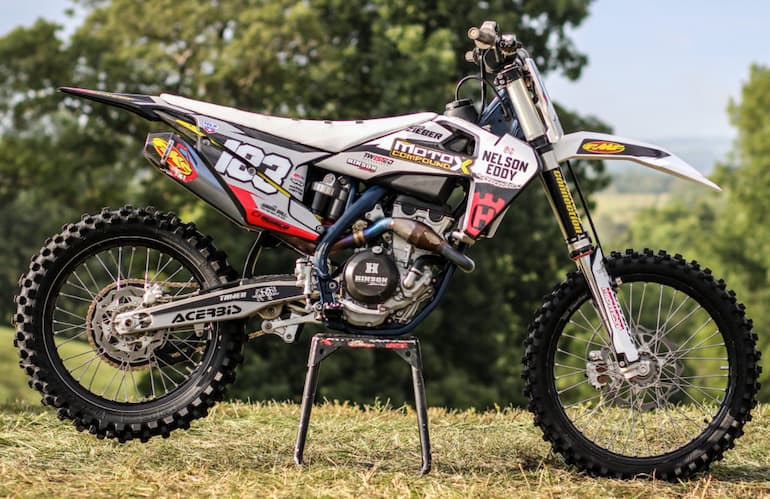
Bikes used in official competition races are best served with custom MX graphics. Besides being offered in the standard brand colours (Honda Red, Husqvarna Blue/Yellow or KTM Orange), bikes can have team colours, names and logos of sponsors and rider numbers and names fitted to almost any part of the bike. Here, you’ll want to take careful consideration of laminate thickness and the quality of the adhesion, especially if you’re riding an older bike needing more preparation to get the graphics looking like they should. High-end graphics makers additionally offer products with extended warranties (five years or more) as well as anti-bubble tech. One of the benefits of custom motocross graphics is that the designs will also be the same across different team gear, including official vehicles used to get the bikes to the track, or any advertising merch like tees.
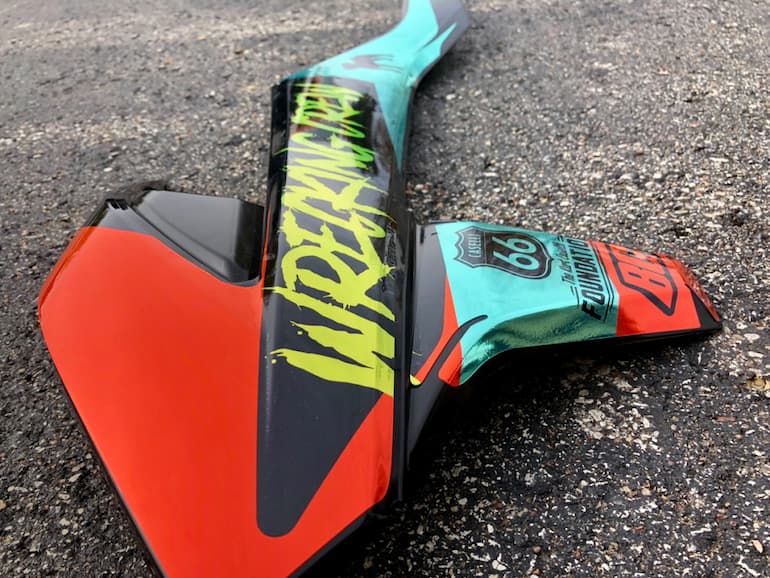
Ensure that you read the reviews of different suppliers, as there are dozens across Australia, and not all deliver the same quality. Decals and prints, as with ready-made kits need to fit precisely on each bike part, and full-bike kits covering all the plastics, like front and rear fenders, front fork tubes and deflectors, swingarm sides, front plates, side panels and air box covers are all separate parts that must work as a whole. Partial or trims kits are easier to design and cheaper to buy and will cover the fender and forks. Additionally, you can source radiator shroud prints or basic kits that only have the rider number printed on the front plate or sides.
Whatever you choose, you’ll want something that can last more than a few races. As mentioned, look for prints in thicker designs, as these also shield plastic parts from damage on or off the track, graphics tailored to your bike, and those that are appealing to the eye.
Applying Your New MX Graphics
Once you’ve decided on a supplier, think of the work needed in an application, A full graphics kit can take a few hours of laborious work, depending on the condition of the plastics and how handy and patient you are with basic tools. Plastic bike parts need to be thoroughly cleaned with soap and water to remove collected dust and any residue from older graphics. These also need to be checked for cracks or broken bits as they will impact how the graphics look and stick.
Scuffed or scratched parts can be restored with the use of sanding paper and plastics restorers, but advanced damage will mean new plastics. Applying your new prints involves aligning the piece with the plastics and pulling back the corner of the backing paper. If there’s a good fit, continue with the rest of the backing paper while pressing the graphics onto the plastics using an edging tool or simple squeegee. And if bubbles form, try pulling back the graphics and reapplying until you get a clean, neat fit. Any rounded bike parts might require you to use a heat gun or hairdryer to heat and stretch the graphics onto the bike.
